

07
August 2020
8 Need-to-Know E-Commerce Image Optimization Hacks
Ever wonder why your product image doesn’t show up when you do a Google search for your product?
Wonder if that big product image on your new landing page might cause slower loading speeds for your customers?
What about conversions? Are your web conversions suffering because you haven’t optimized your images?
Images that aren’t optimized can negatively affect site performance, and therefore, conversions.
And what about customer retention?
Boosting customer retention by just 5% can increase profits by 95%.
And it’s 5 to 25 times more expensive to acquire a new customer than to retain a current one!
Most marketers aren’t coders or designers. But, that doesn’t mean you shouldn’t understand the basics of the tech that plays such a huge role in your conversions and retention.
This means you should absolutely know how to optimize an image.
Here’s why understanding image optimization is so important:
Because images account for more bytes than any other part of a website, especially e-commerce sites, their size and complexity can make or break your web performance.
And that impacts your customer retention and conversions.
This is why optimizing images is one of the best ways to improve website performance and SERP rankings.
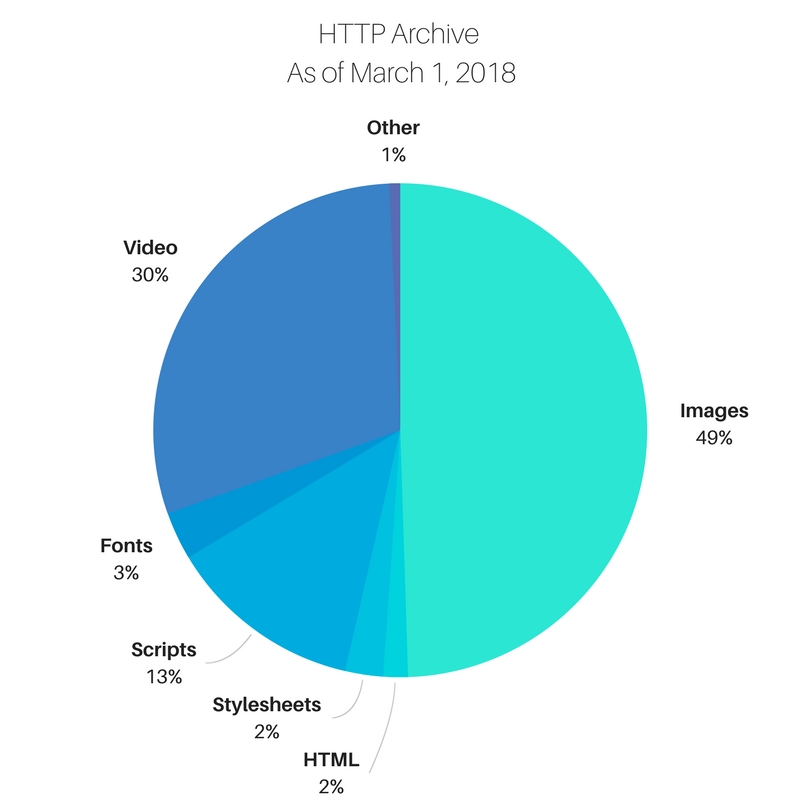
Take a look at the graph below from HTTP archive. As of March 2018, images make up 50% of website content.
As you can see, image optimization should be a top priority for any marketer, particularly marketers looking to convert visitors to buyers on their website.
In this article, I’m going to teach you the top eight ways to optimize your images. These optimization hacks will improve your conversions, SEO rankings, customer retention, and more.
1. Get familiar with different file types
You can’t make a decision on which file type to use if you don’t understand what the file type is, right?
PNG, JPEG, GIFs.
Marketers know these file types exist. And we all love a good GIF.
But again, marketers often aren’t developers or design experts. And the more tech-driven marketing becomes, the more critical it is to get familiar with some of the basics.
The goal with these file types is to understand which ones will give you more bang for less space.
Since it’s all about decreasing load time for your customers, you need to know which file types will work best for the images on your site.
Let’s look at some pros and cons of the three main file types.
JPEG or JPG (Joint Photographic Experts Group)
JPEGs are often the file type of choice for photos and images because they mix blue, red, and green light – allowing for the display of millions of colors.
Other file types often don’t allow all colors to show in an image.
Another huge benefit of a JPEG file is that you can adjust the file size.
When you adjust the file size of a JPEG, you’re also adjusting the quality. Higher quality equals higher file size. But, you can often find a nice balance of image quality to size.
It’s vital that file sizes are not too big. This causes slow loading times, sending your customers away and increasing your bounce rate.
When should you use a JPEG?
- Most likely on all your product images
- Photography images
- Images with many colors
Like these product pictures from Zappos:
GIF (Graphic Interchange Format)
A couple of years back when Apple and Android incorporated GIFs into phone keyboards, the tiny videos became everyone’s favorite way to express themselves.
But GIFs are more than just fun little videos — they’re compressed versions of photographs or videos. These little, compressed videos only allow 256 colors to show in the image.
A high-quality image might contain thousands of colors.
This means that GIFs aren’t the best choice for images with lots of color variation. But, GIFs are the only choice for animation as they allow for animation without the huge file size.
When should you use a GIF?
- For all animation
- Small images (like thumbnails or icons)
- An image with only a couple of colors (like your logo)
Like this one for Google:
![]()
PNG (Portable Network Graphics)
PNGs are newer than JPEGs and GIFs. They’re typically larger in file size than JPEGs but better in quality. They also allow for some flexibility because they have two different file types:
- PNG-8: A smaller file which allows for the same 256 colors that GIFs do.
- PNG-24: This type allows for millions of colors. This is also the best format for images where quality is more important than file size.
When should you use PNG files?
- When image quality is more important than file size
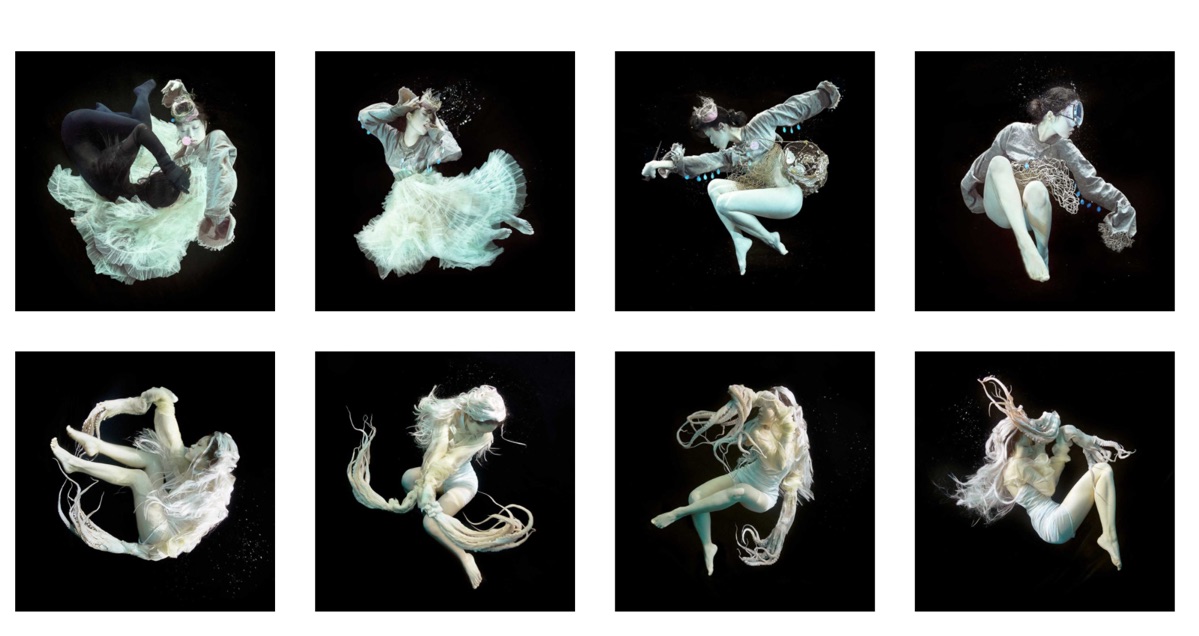
Like these photographs from Zena Holloway’s website:
Pro tip: Use JPEG for colorful and robust images, use PNG for simple images. Use GIF when something must be animated.
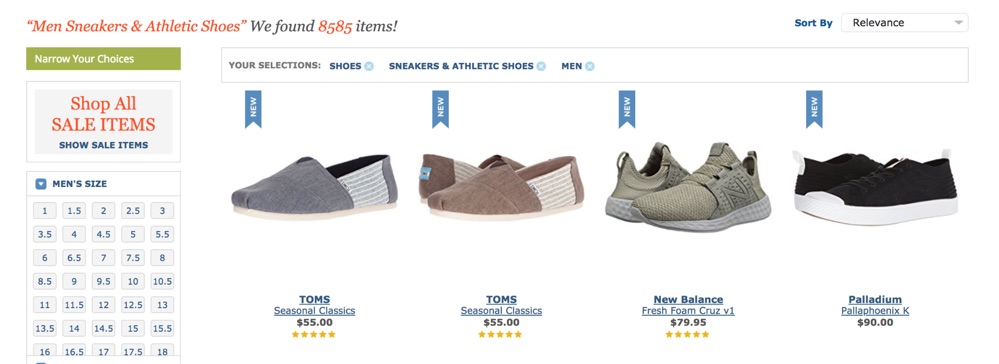
E-commerce marketers should almost always use JPEGs for product photos. Just take a look at the file type comparison below.
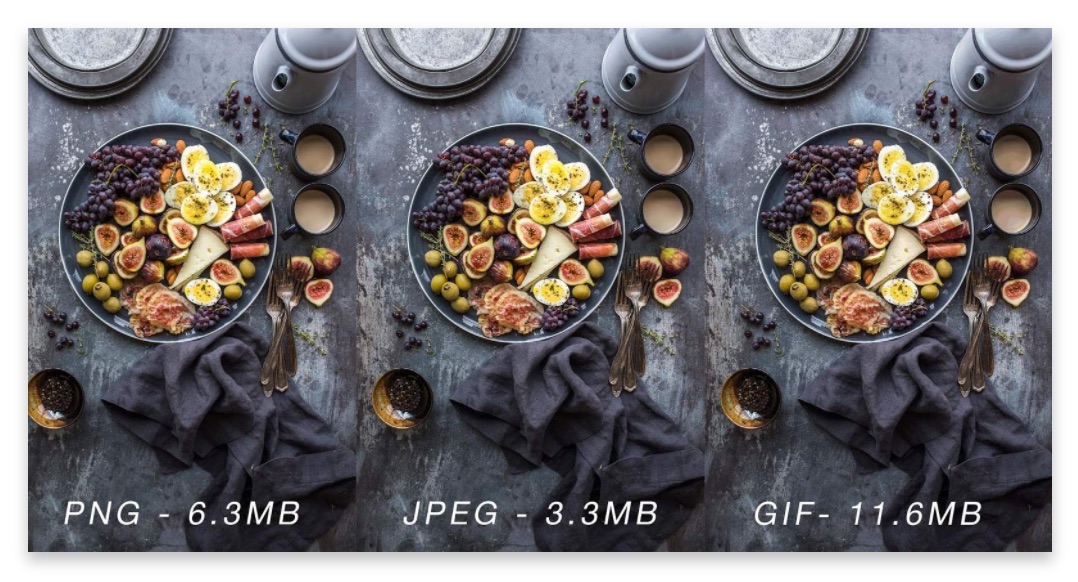
JPEG offers a solid balance between the file size and quality.
2. Get the image file size right to increase conversions
There’s a huge difference between “image size” and “file size.”
When we say, “image size” we’re referring to the dimensions of the image, like 852 x 852.
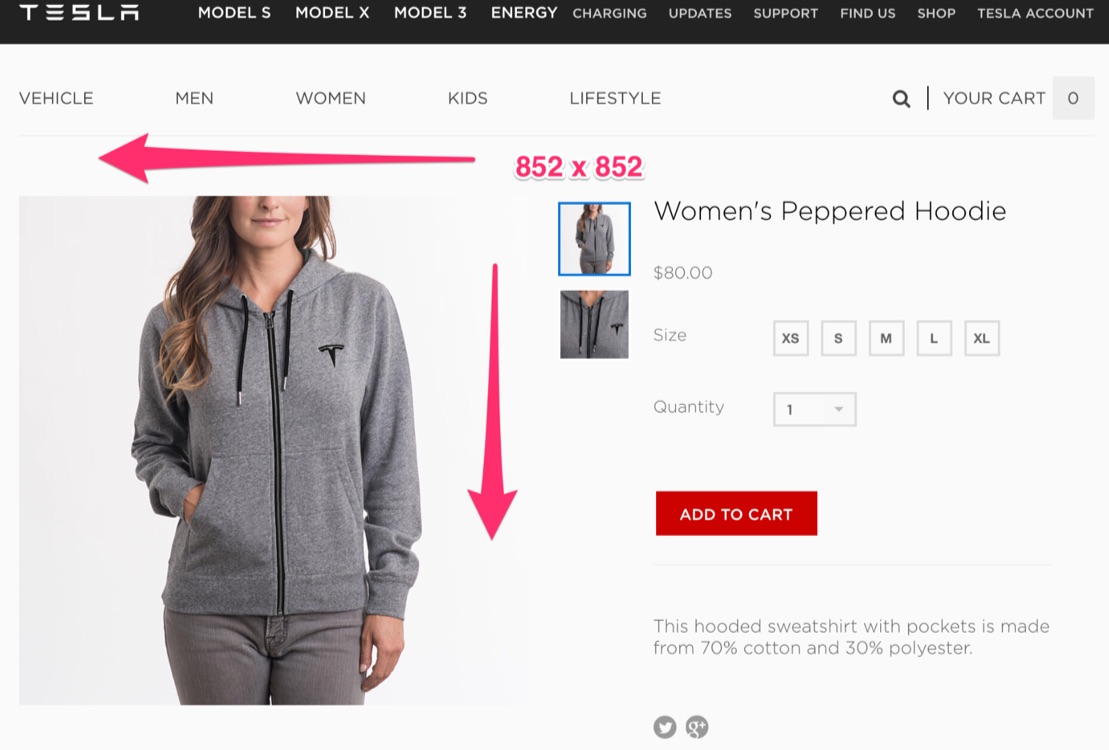
When we say file size, we’re talking about the amount of space required to store the image on your server.
The larger the file size, the longer it takes the image to load.
An image can have large dimensions and still be 2MB or less.
File size is a big deal. It can make or break the performance of your site because every single image must download each time your site is visited.
Your goal is to keep your images at 1 to 2 MB in size. The smaller your image size, the faster your load speeds, meaning a lower bounce rate and more happy customers.
How to resize an image file so that it’s optimized for web performance:
If you don’t have photoshop, no worries. Pixlr is a quick way to resize an image file.
First, go to PIXLR and click on the editor:
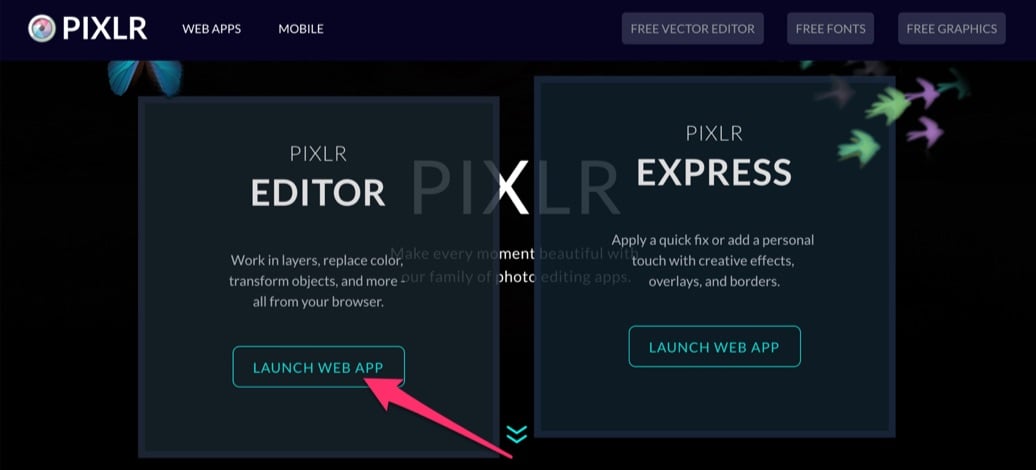
Then launch either the Pixlr Editor or Pixlr Express. If you’re just doing a quick resize, Pixlr Express works great.
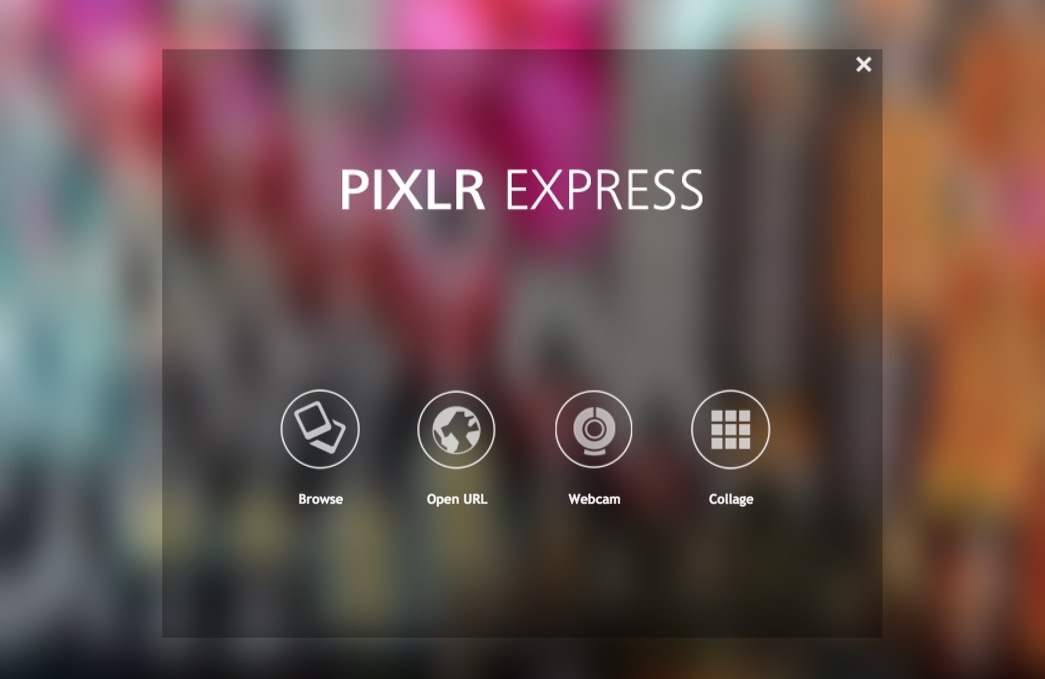
Next, upload your image to the editor.
Finally, adjust the size by saving the image. As you toggle the image-quality bar, notice that the file size also increases or decreases depending on the quality you choose.
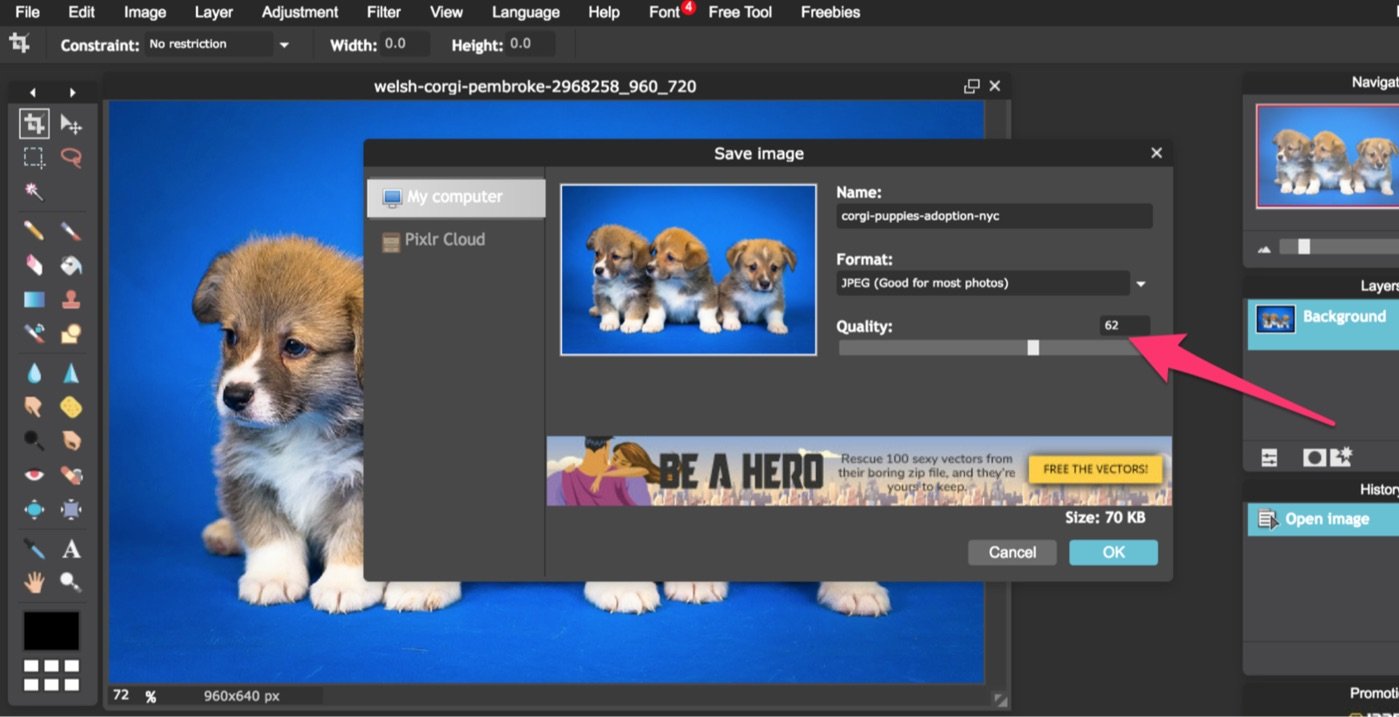
When it comes to finding the right file size for the quality you need, you might have to play around with it for a bit.
Try several sizes on, and go with the smallest file size that still looks good.
Once you’ve got that size-to-quality ratio figured out, then you can apply it to similar images in your store.
It might be a good idea to write this ratio down somewhere.
3. Name your files correctly to improve SEO
What you name your images matters to search engine web crawlers.
Many marketers don’t change the name of a picture from the random number or code assigned by our computers or phones.
It’s important to name your image in a descriptive, to-the-point manner so that search bots can understand what the image is showing.
For example, the puppy image on the left has a much better name than the one on the right:
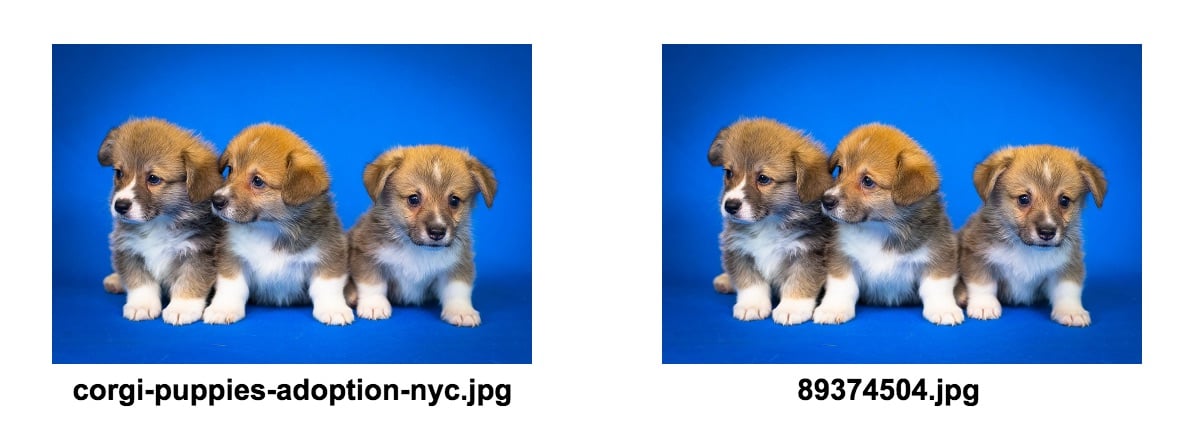
Nothing against image 89374504, but it doesn’t tell us, or Googlebots, what the image is.
A great image name is descriptive, contains the keyword of your image (like corgis for adoption in NYC.
If you’re selling blue suede shoes, then blue suede shoes should be in the image name.
Keep it straightforward and descriptive to get the best SEO results from your images.
4. Keep your site accessible to all customers with alt tags
Alt tags are descriptions given to an image that exists within your website’s code. This essentially means that what’s in the image is written into the code of your website.
Alt tags help in 3 key ways:
- Visually impaired people using screen readers know what the image is because of an alt attribute. When they hold their cursor over the image, the screen reader can literally read the alt attribute description to them.
- It’s a line of code that tells the browser what’s supposed to be there if an image can’t load properly. This comes in handy if your site’s having loading issues.
- SEO crawlers read them which helps improve your SEO.
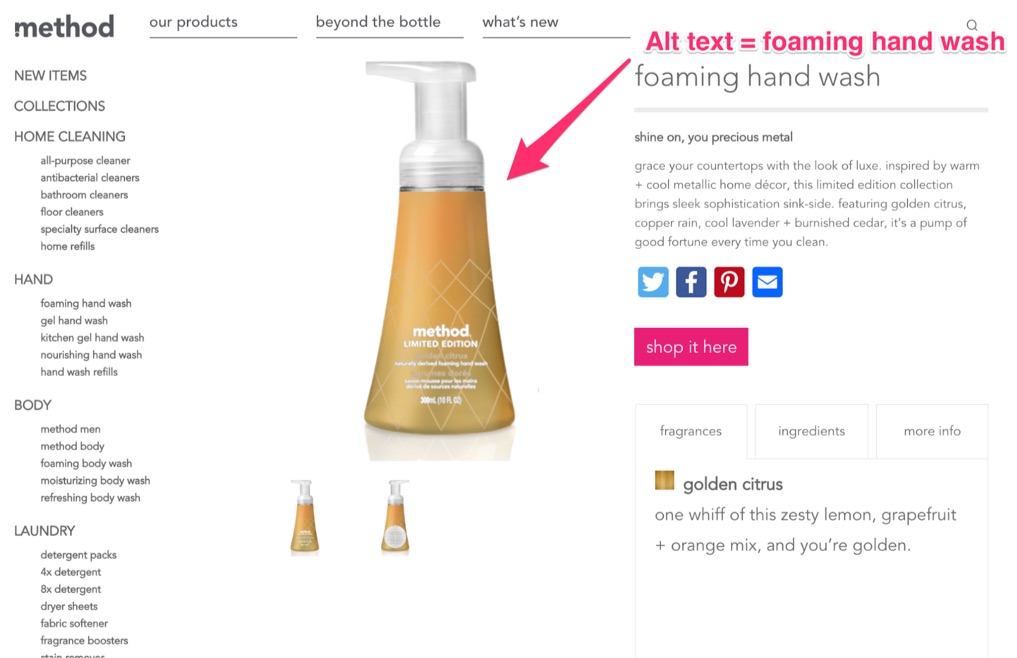
For example, the alt text for this limited edition Golden Citrus Foaming Hand Wash is “foaming hand wash.”
The main goal with alt attributes is to make sure they are descriptive, simple, and to-the-point. Much like the file name.
Setting An Alt Text In WordPress
When you upload an image into a website hosted on WordPress, you’ll have the option to give it both a title and an alt attribute.
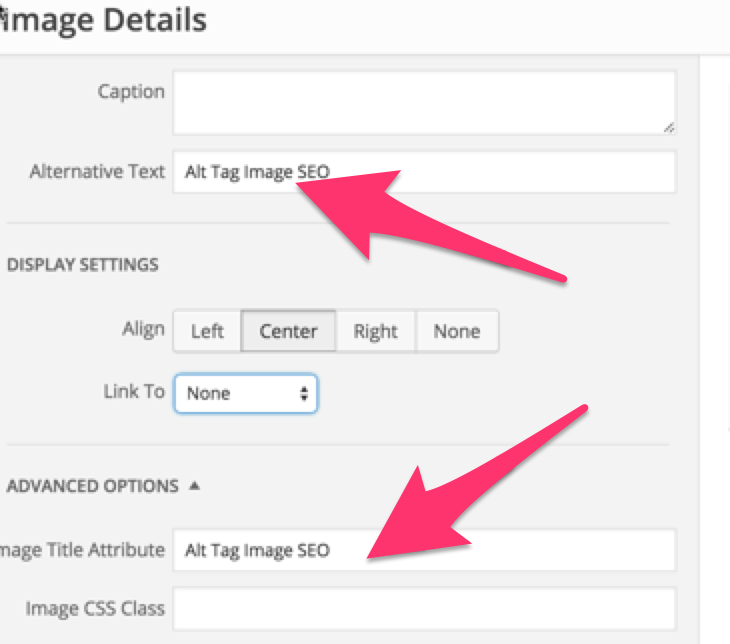
If you don’t create your own alt tag, then WordPress will automatically make the alt tag the same as the title.
This might be good or bad, depending on what you might need to convey to a visually-impaired customer.
For example, if your image name is blue-boots, you may want to add a few more details to the alt attribute. Like, blue-hiking-boots-mens-size-10.
If you want to change or add an alt attribute, then simply navigate to the image settings and rename the attribute.
Alternate attributes are a must for anyone looking to fully optimize their website. They improve user experience and also help with SEO.
5. Use sitemaps to get your images noticed by Google
Does your e-commerce store contain image galleries? What about pop-ups like a call-to-action or email signup?
These days, consumers love infographics, memes, and videos. Guess what? You should add those to your sitemap too.
A sitemap allows you to optimize these images and videos for Google’s algorithms.
So what’s a Sitemap? To quote Google: “A sitemap is a file where you can list the web pages of your site to tell Google and other search engines about the organization of your site content.”
It allows search engine web crawlers, like Googlebot, to crawl your site intelligently.
In other words, it’s a file that contains a map of all of your site’s content.
Here’s an example of a sitemap:
For video entries you should include:
- Title
- Description
- Play page URL (location)
- Thumbnail URL
- Raw video file URL and/or the video player URL
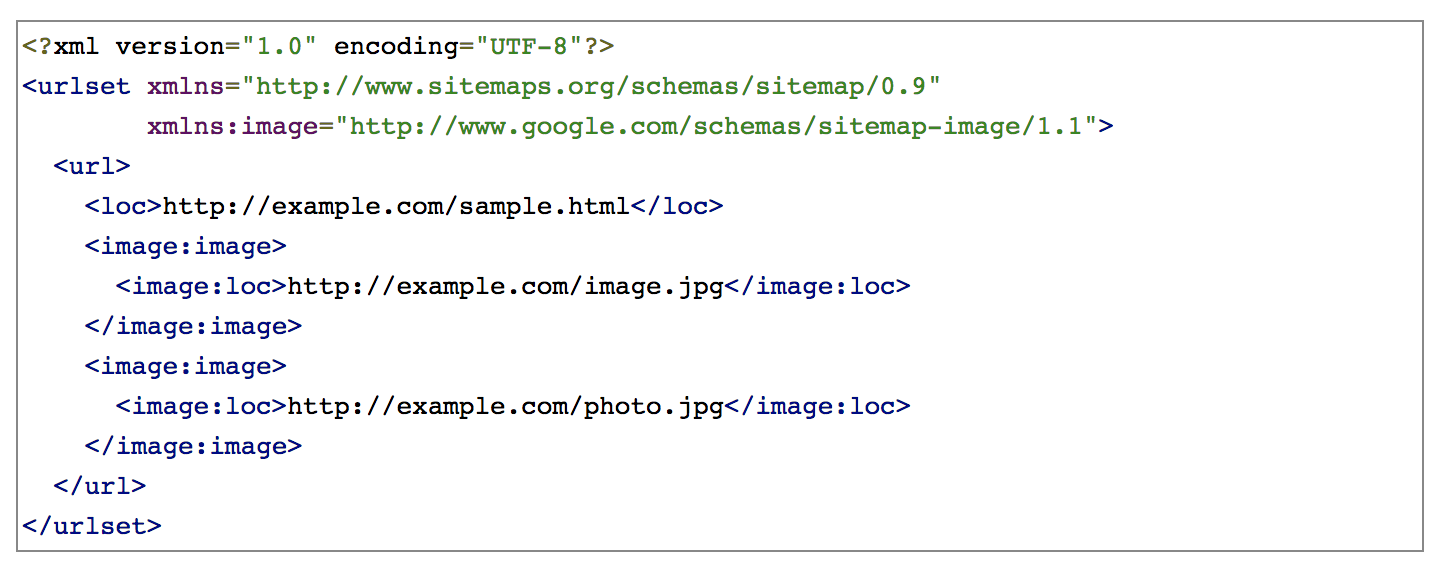
For image entries you should include:
- Location (Location, or the URL where the image is located is mandatory. All other bullets are optional but recommended)
- Title
- Description
- Caption
- License
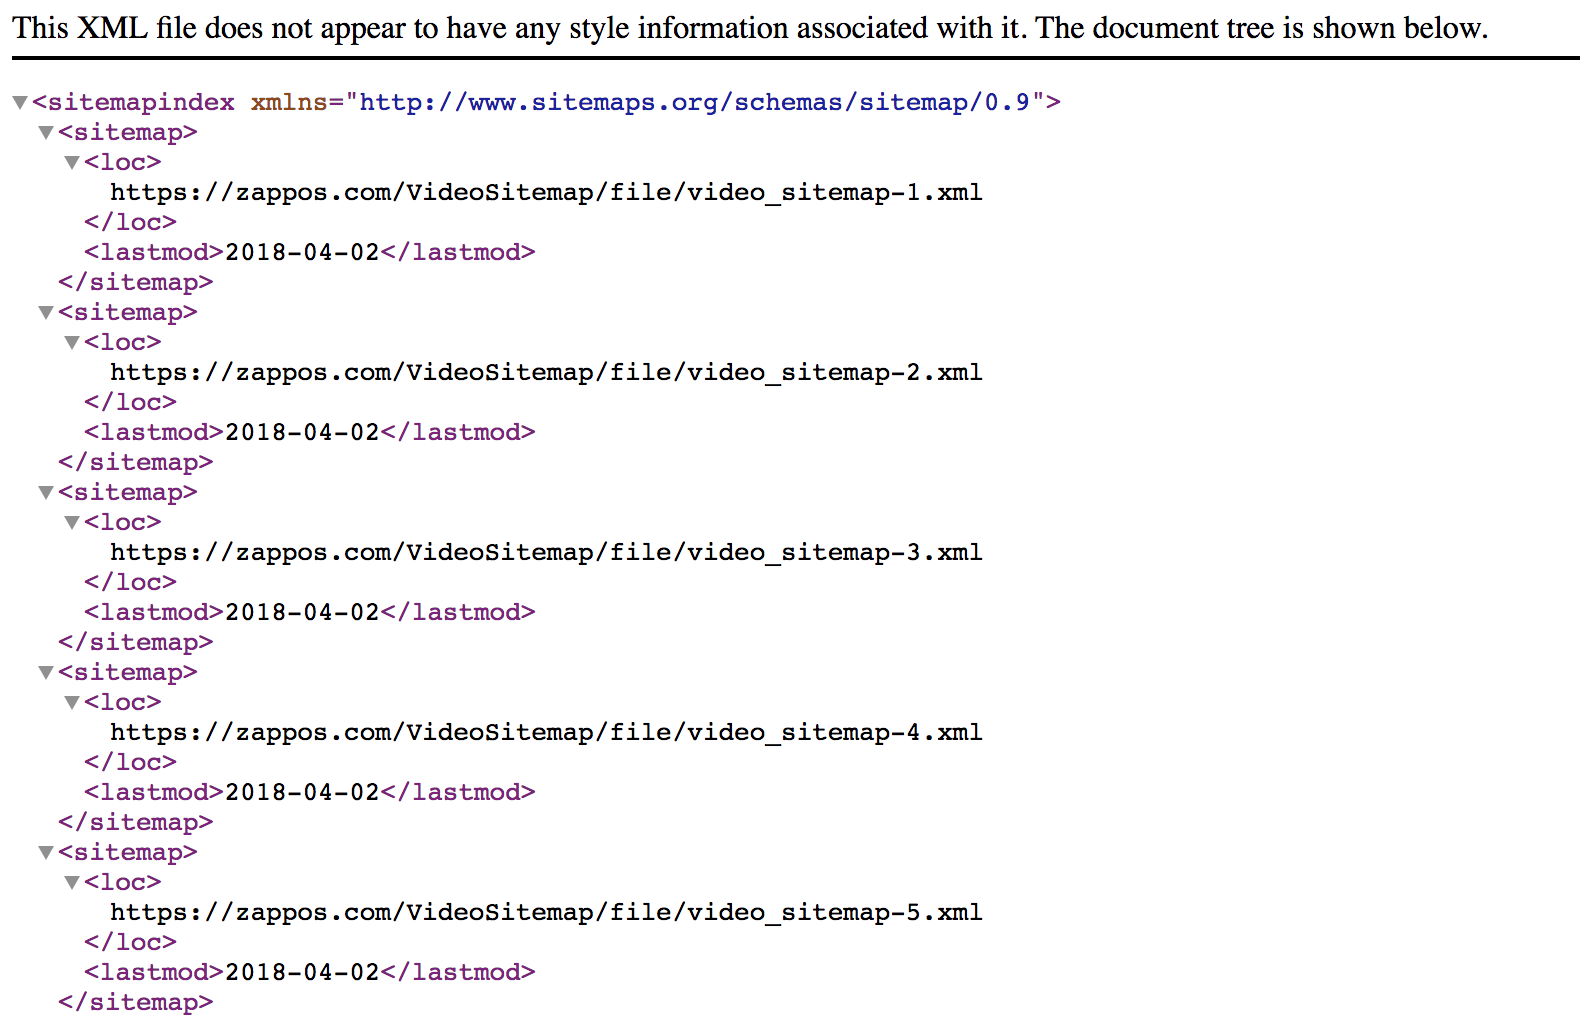
Below is a sample video sitemap from Zappos:
If you have tons of images and videos, then you may want to create separate sitemaps for each type of content.
Sitemaps are essential, and you should absolutely add your images, videos, etc. if you’re looking to get your content noticed by Googlebots, Bingbots, and other search engine crawlers.
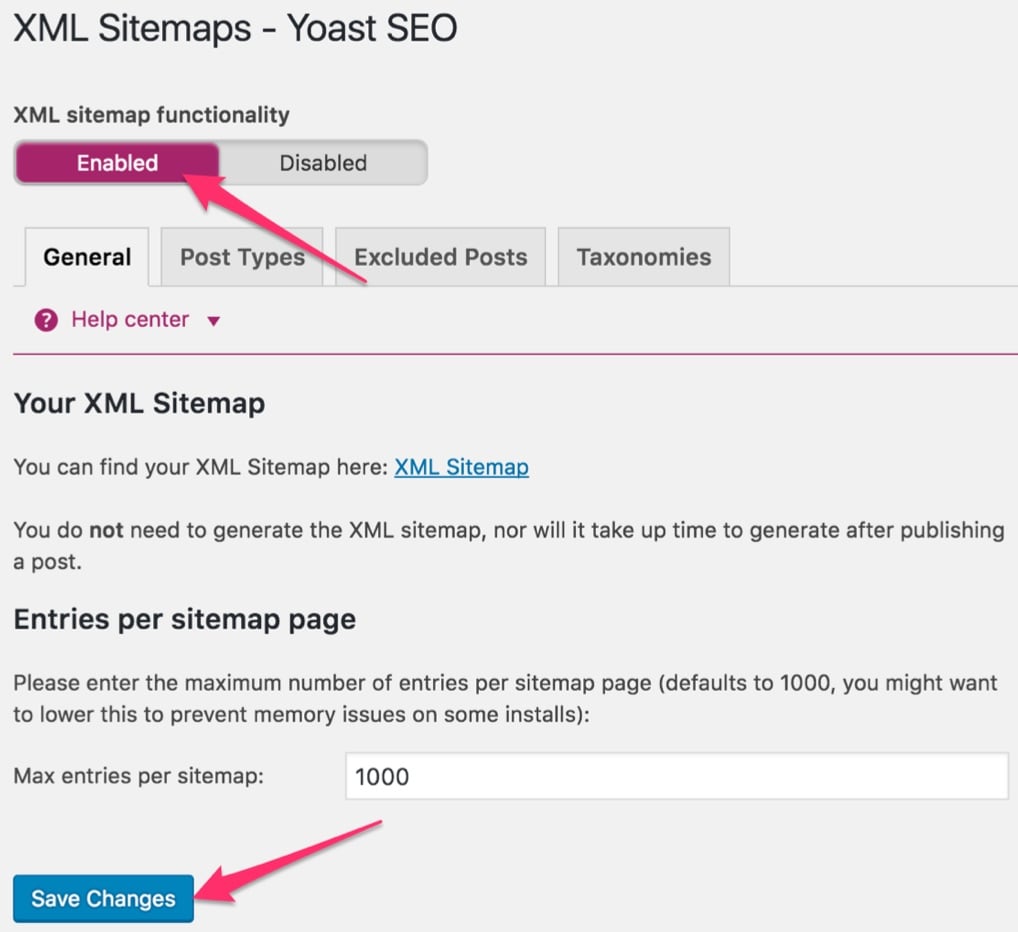
If your site is hosted on WordPress, you can use Yoast SEO which will automatically add your content (images, videos, etc.) to a sitemap.
If you don’t have Yoast SEO already, it’s easy to install.
Then to have Yoast SEO add your content to a sitemap, just make sure the enable button is on and save changes:
6. Optimize your thumbnails to drive upsells
Remember when you bought that awesome cell phone case just after you upgraded?
You probably found that case at the bottom of the purchase confirmation page just after your payment went through.
That thumbnail image upsold you! These images are a great way to advertise other products to your customers either once they’ve made a purchase or while they’re browsing other products.
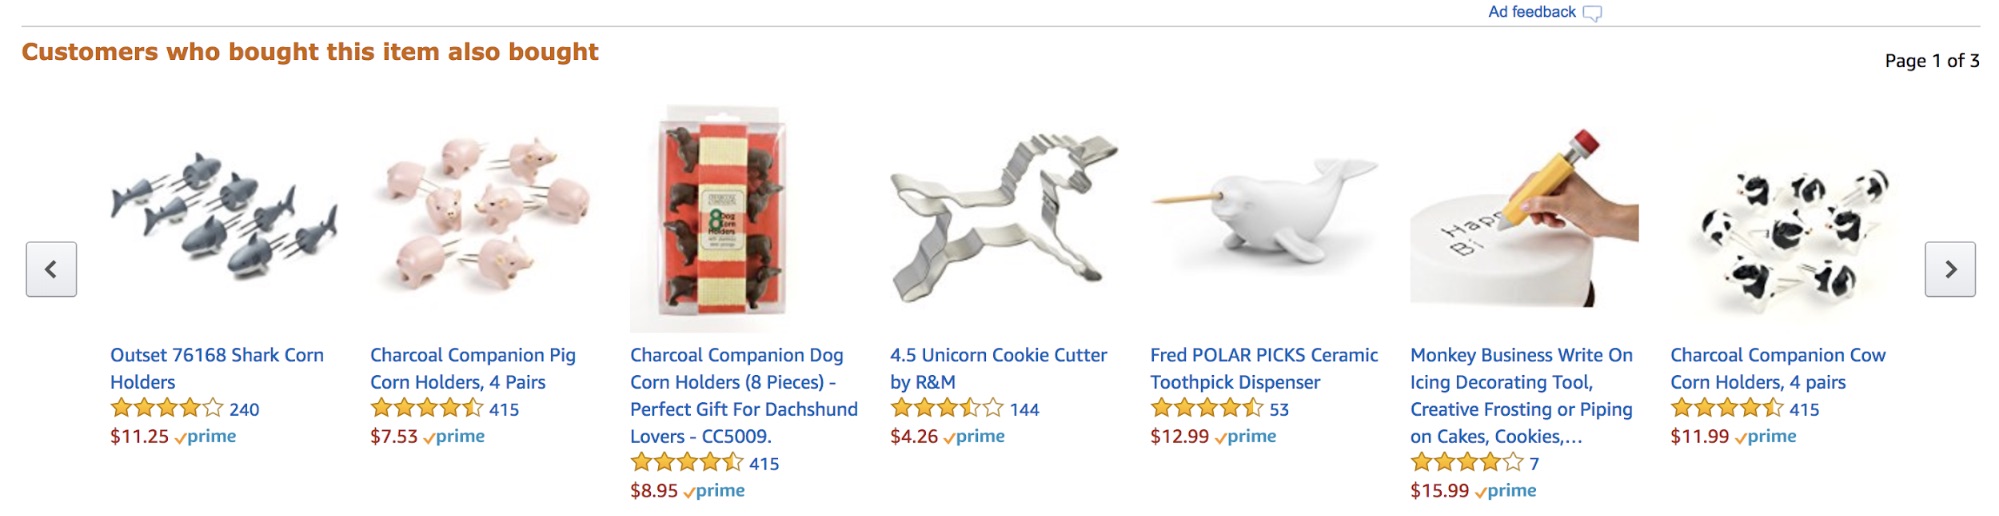
Check out how Amazon uses thumbnails at the top to entice customers to click on similar or related products.
An upsell is an add-on, upgrade, or additional product that a seller introduces to you after an initial purchase.
Thumbnail images are often displayed, many at a time, at the bottom of a page. Like these displayed at the bottom of a J.Crew shirt product page.

The goal is usually an upsell. You should absolutely display related products below or above the cart or purchase page and entice your customers to click.
But, if those thumbnail images don’t load, you’re missing out on a ton of potential business.
Once a customer has arrived at your site, through say, a Google ad, you’ve already paid to get them there. So, the more they buy, the lower your customer acquisition cost.
So, just because they’re tiny, don’t disregard your thumbnail images as less important to your business profitability.
They need to be super small in file size. Less than 70 KB is ideal.
They’re best as JPEG or GIF files. Use Pixlr if you need to resize your files.
And don’t forget to name your thumbnail images. They need solid names and alt attributes just like your product pics.
Getting these thumbnail images optimized will help you improve SEO and hopefully increase the amount of profit you generate from each web conversion.
7. Capture both the technical and aesthetic aspects of images
It’s important to understand both the technical and aesthetic aspects of images on an e-commerce site.
1. Technical images: These are the images where you want to focus on image size, file type, resolution, etc. Something like this:
You want your product images to be quality JPEGs that aren’t too large in file size (like we discussed above).
2. Aesthetic images: These are the images where you should focus on product styling, background color, etc. Take this image, for example:
Just take a look at the shadow effect and clean grey background.
8. A/B test images to improve conversions and retention
Marketers love a good A/B test, right? Well, your images should be no exception to the rule.
Too many images, too slow of a load time, or the wrong image angles can lose sales for your company.
Here are some best practices for testing images:
• Quantity: Test between many and a few images per product, per category, per page, etc. You can even test how many thumbnails to feature below each product.
Testing quantities will allow you to determine what’s best for your customers.
• File size vs. quality: You can test if higher quality and slower loading times effect conversions for your site.
For example, if you have a more expensive product, like designer handbags, your customers may be happy to wait for a higher-quality image to load.
That way they can zoom in and out and see every detail of it before purchasing.
• Test which images your customers like: Maybe your customers prefer to see both the top and side of your newest shoes.
Or, perhaps they convert more often when they’ve got fewer angles to study. You’ll never know until you test.
Remember, when you’re A/B testing that it’s important to test only one variable at a time.
For example, if you’re going to test the quantity of images you have on a category page, then don’t test image quality at the same time.
If you test more than one variable at once, you’ll never know which variable resulted in higher or lower conversions.
Check out this article for a more thorough guide to A/B testing.
Here are a few of my favorite image optimization tools
With all of these new image optimization hacks, you’re going to need some tools to help you accomplish your goals.
Here’s a list of my favorite tools to help you along your journey.
Image size and quality
Pixlr: As I mentioned above, can use this free tool to edit images, and to increase or decrease JPEG file size or quality.
ImageOptim: Decrease file size by compressing your images without losing quality with this tool. (Mac only)
Kraken: Upload your images in bulk, compress them all at once, and download as a zip file to save time.
WordPress Plugins
Yoast SEO: Optimize your image SEO and site accessibility by automatically assigning an alt attribute.
ShortPixel: Optimize your image size within WordPress
EWWW Image Optimizer: Automatically optimize images when they’re uploaded to your site.
Conclusion
It’s easy to see why there are tons of tools out there for image optimization. It can have a huge impact on your business.
E-commerce businesses, in particular, need to pay attention to their image size and file names.
This is because e-commerce sites typically have more images than other business types and also rely on their images to earn a conversion.
Start with a descriptive image name and alt attribute that will keep your images crawlable by Googlebots and also improve site accessibility.
Then implement a sitemap to give search engine crawlers even easier access.
Keep your images at the smallest size possible without sacrificing quality to improve load time and help convert more of your traffic.
Optimize your thumbnails and use them to upsell your customers.
Finally, A/B test to improve conversions and customer retention. But be sure to only test one image variable at a time so you know which changes are making an impact.
Implement these eight image optimization hacks, and you’re sure to see improvements in your rankings and revenue.
Source: https://neilpatel.com